How to Photograph Handmade Jewelry for Etsy
Jewelry is the hardest handmade category to photograph, and the one where photos matter most. The pieces are small, often reflective, and the detail that justifies the price, a hammered texture, a hand-set stone, a slightly irregular solder seam, disappears the moment the lighting is wrong.
It is also the category where buyers are most nervous. They cannot hold the piece, cannot judge its weight, and cannot tell whether the gold is warm or cold in real light. Your photos have to answer those questions before they are asked. This guide covers how, using a phone and daylight.
Why jewelry photos decide the sale
On Etsy, the first photo drives search click-through and the rest drive conversion. Around 90% of Etsy shoppers say photo quality is the most important factor in a purchase decision, ranking above price and reviews. For jewelry, photos also do a second job: they set expectations about size, colour and finish, which is what prevents returns.
Listings with seven or more photos measurably outperform those with fewer, and Etsy allows ten. For jewelry, those extra slots are not padding. Each one answers a specific buyer question: how big is it, what does the clasp look like, how does it sit on the body, what will arrive in the box.
Light: the whole game
Use soft, indirect daylight. Place the piece near a window but out of direct sun, and diffuse the light with a sheer curtain or a sheet of white paper. Direct sun creates blown-out hotspots on metal and hard black shadows in the recesses of a setting. Overcast days are ideal for jewelry.
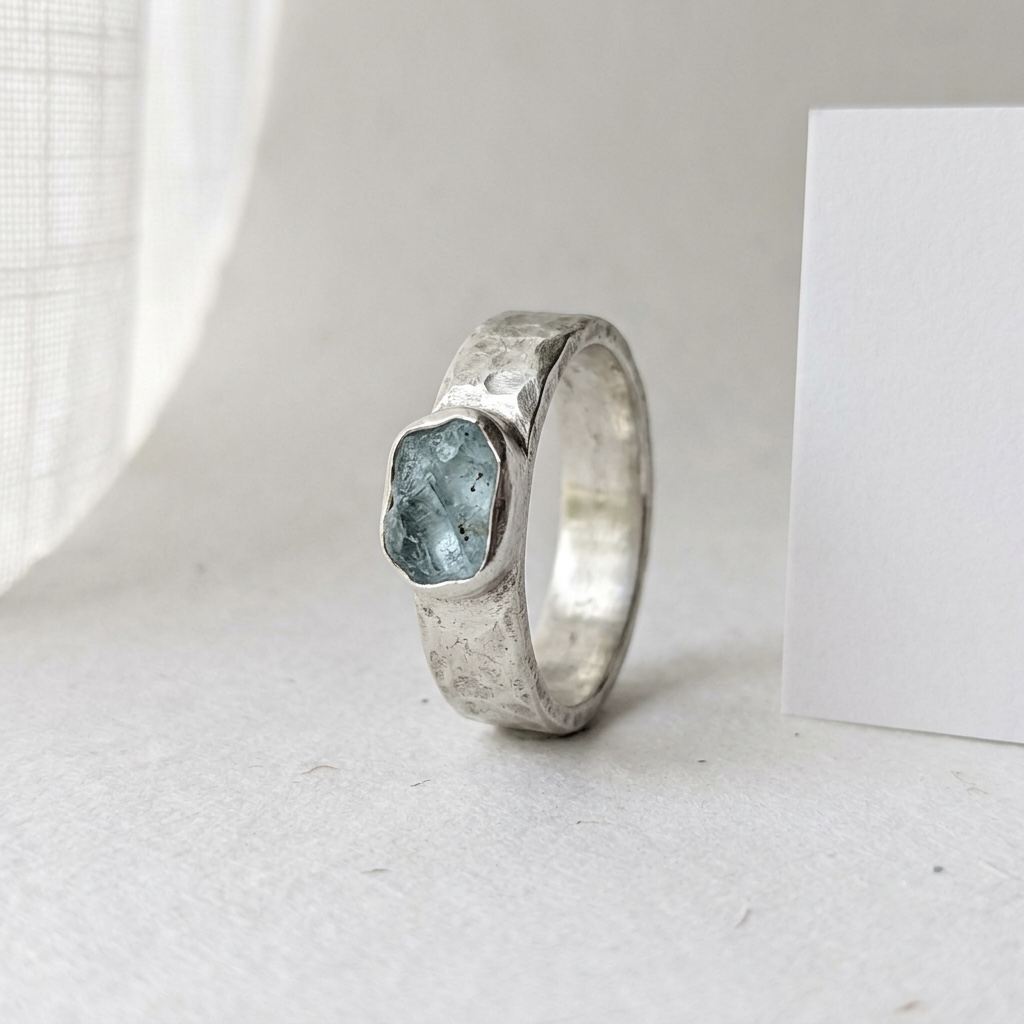
A few specifics that matter for jewelry more than for other crafts:
- Diffuse, do not dim. Beginners often move the piece away from the window to control glare. That kills the sparkle instead. Keep it close to the light and put something translucent between the two.
- Bounce light back in. A folded piece of white paper or card placed opposite the window lifts the shadow side. Without it, one side of a ring goes muddy and the metal reads dull.
- Avoid mixed light. Turn the room lights off. Daylight plus a warm bulb gives you a piece that is cool on one side and orange on the other, which is very hard to fix later and makes silver look dirty.
Reflections: control what the metal can see
Polished metal is a mirror. It does not photograph the light, it photographs the room. So instead of fighting reflections, control the environment the metal reflects: surround the piece with white surfaces, and keep yourself and dark objects out of its line of sight.
This is the single most useful idea in jewelry photography, and it is the one most guides skip. If a silver band looks blotchy, it is not the camera. It is reflecting your dark shirt, the window frame, and the phone itself.
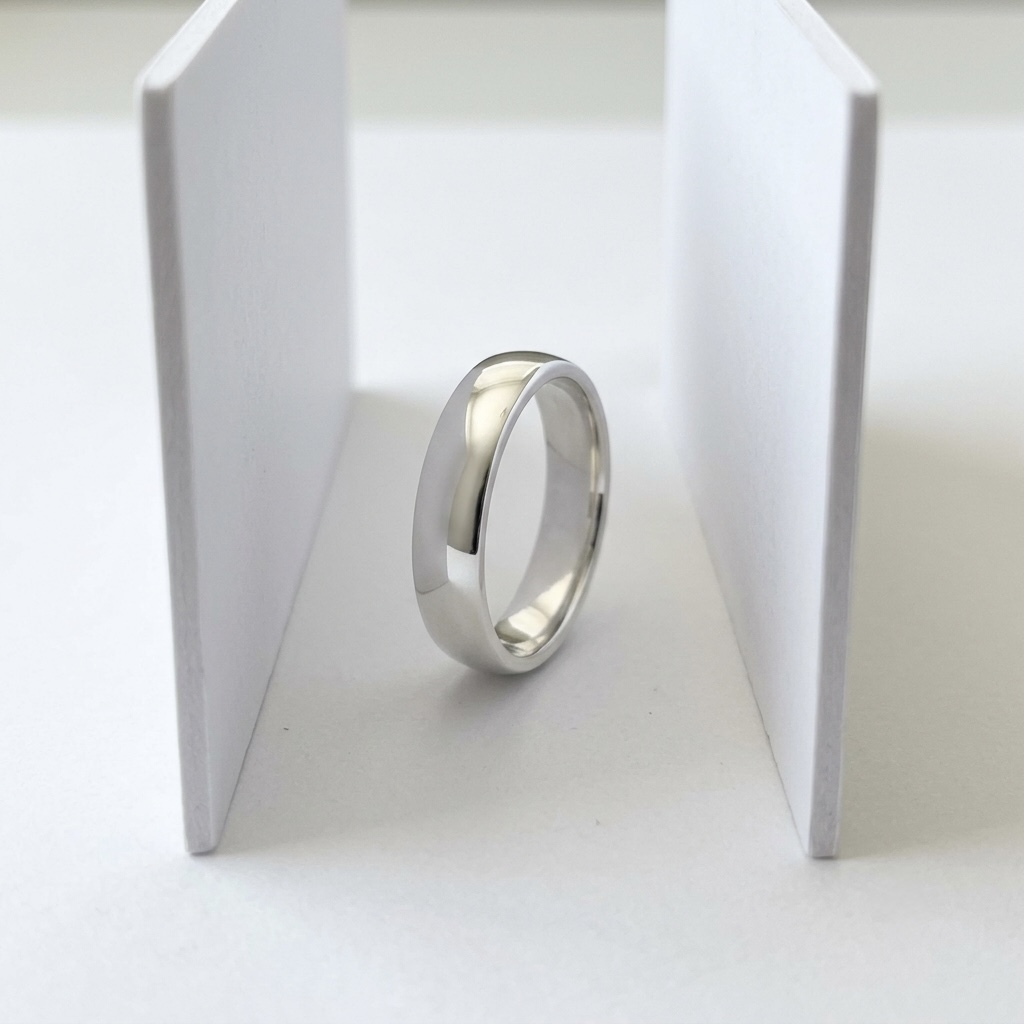
Practical fixes, in order of effort:
- Wear a light-coloured top when shooting. Genuinely, this changes the photo.
- Stand two sheets of white paper or card on either side of the piece, like walls. The metal now sees white and the highlights turn into clean, soft gradients.
- For a full solution, make a light tent: a translucent box, a white plastic bag over a frame, or a sheet of baking paper curved around the piece.
- Shoot slightly off-axis so the phone itself does not appear as a dark rectangle in the most polished surface.
The angle: never flat on
Angle the piece rather than shooting it perfectly flat. A ring photographed straight down looks like a circle with no depth; tilted slightly, it shows the profile of the band, the height of the setting, and the way light travels across the metal. A small propping wedge, even a folded piece of card hidden behind the piece, makes the difference.
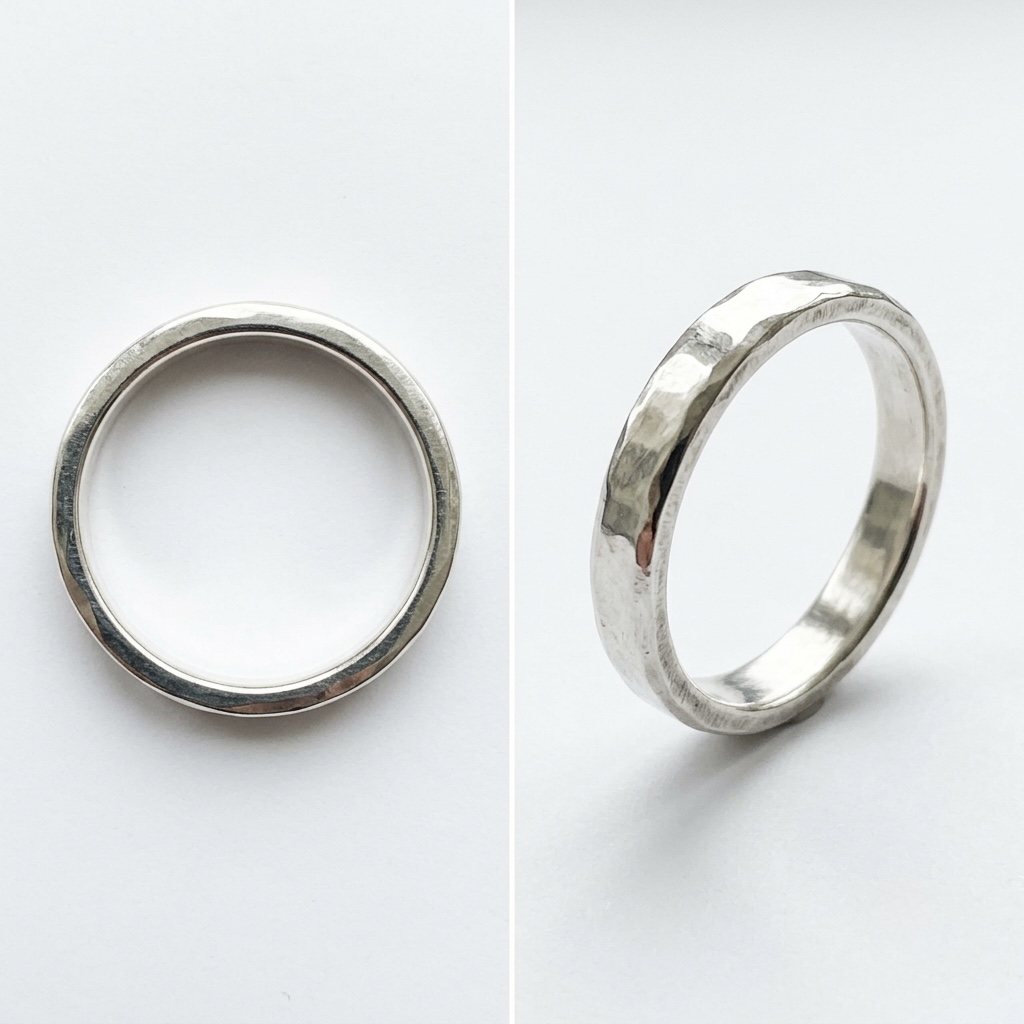
For each type, the angle that reads best:
- Rings: tilted about 30 to 45 degrees so the band and the stone are both visible. Use museum putty or a small clear stand to hold it.
- Earrings: in a matched pair, one facing forward and one turned slightly, so the buyer sees the front and the profile at once.
- Necklaces and pendants: lay the chain in a soft curve rather than a straight line, and keep the pendant flat to the camera so the detail is sharp. A tangled or dead-straight chain looks careless.
- Bracelets: curve them naturally, as they would sit on a wrist, rather than flattening them into a circle.
Material by material
Silver and polished metal
Silver reflects everything and shows every fingerprint. Clean the piece with a soft cloth immediately before shooting, surround it with white cards, and expose slightly darker than you think, because bright metal fools the phone's meter into underexposing everything else.
If silver looks grey rather than bright, it is almost always a reflection problem, not an exposure problem. Add white on both sides before you touch the brightness slider.
Gold and brass
Warm metals need accurate white balance, or gold reads brassy and brass reads orange. Shoot in daylight only, avoid warm indoor bulbs, and if your phone lets you lock white balance, do it. Take one photo with a plain white sheet of paper in frame so you have a reference for correcting colour later.
Colour accuracy matters commercially here: a buyer who expected warm 14k and received something that looks brassy in the photo will hesitate, and one who receives something different from the photo will return it.
Gemstones and faceted pieces
Stones need a small, directional highlight to come alive. Fully diffused light makes them look flat and dead. Keep the overall lighting soft, but let one slightly brighter source catch the facets, then rotate the piece a few degrees at a time and shoot multiple frames until the stone flashes.
Transparent stones also need light coming through them, not just onto them. Lifting the piece slightly off the surface, so daylight passes behind the stone, is what makes it glow rather than look like grey glass.
Resin, glass and enamel
These are the hardest, because they are both reflective and translucent. Shoot them with light coming from behind and to the side, at an angle, and place them on a light surface so colour bounces up through the piece. Watch closely for reflections of your phone appearing in the glossy surface.
Textured and oxidised pieces
Hammered, forged, oxidised and raw-finished pieces need directional light, not flat light. Texture only becomes visible when light rakes across it from the side and casts tiny shadows in the marks. If you diffuse too heavily, you erase exactly the evidence of handwork that justifies your price.
This is worth saying plainly, because it runs against the usual advice: for handmade jewelry, perfectly even lighting is often the wrong goal. Some shadow is what proves a human made it.
Scale: the shot most sellers forget
Include at least one photo that shows how big the piece actually is. Worn shots are the strongest, on a hand, ear, wrist or neck. If you cannot photograph it worn, place it next to a familiar object such as a coin. Size confusion is one of the most common causes of jewelry returns and of pre-purchase messages.
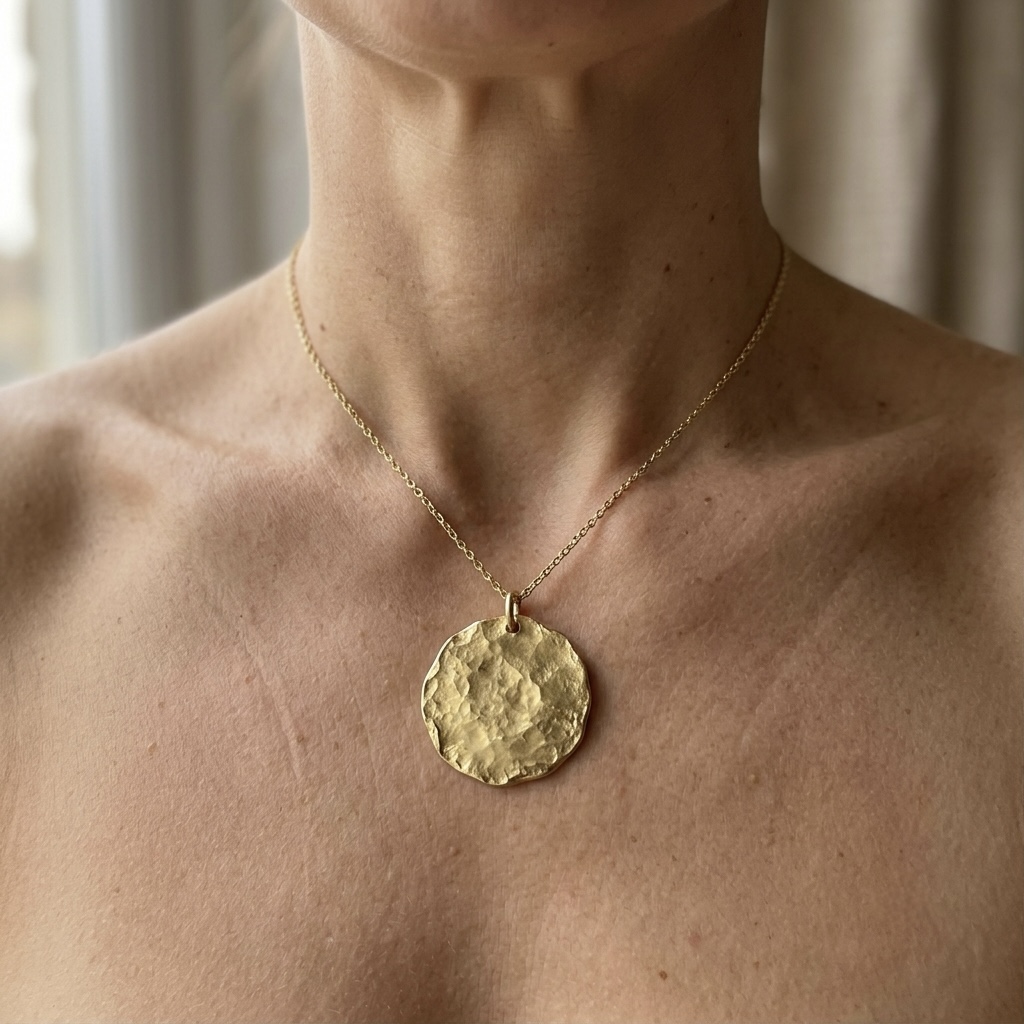
A close-up macro shot on a plain background gives the buyer no reference at all, and a beautifully lit pendant can read as either a delicate charm or a statement piece. Every listing needs one honest scale reference, and dimensions in the description as well.
Filling your ten Etsy photo slots
Use as many of the ten slots as you can, with each photo doing a different job rather than repeating the same angle. A strong jewelry set is: hero, detail, worn, finish, styled, packaging.
| Slot | Shot | What it answers |
|---|---|---|
| 1 | Hero, clean background, angled | What is it, and is it well made |
| 2 | Detail close-up of texture or stone | Is the quality real |
| 3 | Worn on the body | How big is it, how does it sit |
| 4 | Clasp, back, hallmark or finish | Is it properly finished |
| 5 | Styled, on linen or wood | What is the mood, is it my style |
| 6 | Scale next to a familiar object | Exactly how big |
| 7 | Packaging as it arrives | Is it gift-ready |
| 8+ | Variations, colours, second angle | What are my options |
Your first photo does a different job from the rest. It has to work as a small square thumbnail in search results, competing against dozens of others. Simple, bright, and clearly readable at a glance beats artistic and busy every time.
Phone settings that actually matter
Do not get too close. Most phone cameras cannot focus below roughly 10 to 15 centimeters, and pushing closer produces a soft, mushy image. Back up, keep the piece sharp, and crop afterwards. Tap to focus on the most important detail, and steady the phone against something solid, because at close range the smallest shake blurs fine texture.
- Clean the lens. A smudged phone lens turns every highlight into a foggy bloom. Wipe it before every session.
- Turn the flash off. Always, for jewelry. It flattens the piece and creates a hard white blowout on metal.
- Shoot square (1:1) or crop to square, since Etsy's thumbnail is square, at 2000x2000 pixels.
- Take more frames than you think. With reflective pieces, a two-degree rotation is the difference between dull and brilliant. Shoot ten, keep one.
Editing: the line between improving and lying
Adjust exposure, contrast, white balance and cropping freely. Do not change the colour of the metal, the shape of the stone, or remove the hand-finished marks. Buyers who receive something different from the photo return it, and jewelry returns are expensive.
The most common self-inflicted wound in handmade jewelry photography is over-smoothing: sliders pushed until the piece looks like a mass-produced catalog item. That erases the exact quality your buyer is paying a premium for. Aim for accurate, not perfect.
Where AI photo tools help, and where they fail
AI tools can restage a phone photo of a finished piece into a clean or styled scene, which saves time and props. Jewelry, however, is the category where they most often fail, because reflective metal, faceted stones and fine hand-finished texture are exactly what generic tools smooth into a uniform catalog look. Test any tool on your most reflective piece before trusting it with your catalog.
What to check in an AI-generated jewelry photo before you publish it:
- Is the metal the same colour as your real piece, and still the same metal?
- Is the stone the same shape and cut, with the same number of facets?
- Are the hand-finished marks, hammering, texture, patina, still visible?
- Has the clasp, setting or solder seam been invented or altered?
If any of those changed, the image is no longer a photo of your product. Tools built for the handmade niche, including Nunoi, prioritise this kind of product fidelity rather than normalising the piece into a generic look, but the check is worth doing whatever tool you use.
Try it on your own piece
See how your jewelry looks restaged with AI photos that keep the hand-finished detail. Free to start, no studio and no photographer.
Try Nunoi freeFrequently asked questions
What is the best background for handmade jewelry photos?
A plain white or off-white background works best for your main Etsy photo, because it keeps the focus on the piece and meets marketplace expectations. For secondary photos, natural textures like linen, light wood, or stone add warmth and signal handmade quality without competing with the jewelry.
How do I photograph shiny jewelry without reflections?
Diffuse the light rather than removing it. Shoot near a window with a sheer curtain, or place a piece of white paper between the light and the piece. Reflective metal mirrors whatever surrounds it, so control what the metal can see: a white card on each side softens hotspots and removes dark blotches.
How do I show the size of a piece of jewelry?
Include at least one photo showing scale. The strongest options are the piece worn on a hand, wrist, ear, or neck, or the piece next to a familiar object such as a coin. Size confusion is one of the most common causes of jewelry returns, so a scale shot reduces both returns and pre-purchase questions.
Do I need a macro lens for jewelry photography?
No. Modern phone cameras handle jewelry well if you avoid getting too close. Most phones cannot focus below about 10 to 15 centimeters, so backing up slightly and then cropping produces a sharper result than pushing the lens closer.
How many photos should a jewelry listing have?
Fill as many of Etsy's ten photo slots as you can. A practical set is: a clean hero shot, a detail close-up, a worn or scale shot, a photo showing the clasp or finish, a lifestyle or styled shot, and one showing packaging. Listings with more photos consistently outperform those with fewer.
Can AI photo tools handle handmade jewelry?
Some can, but jewelry is the hardest category for them because reflective metal, faceted stones, and fine texture are exactly what generic AI tools tend to smooth away. Test any tool on your most reflective or textured piece first, and check that the metal colour, stone shape and hand-finished marks still match your real item before publishing.
Written for handmade sellers on Etsy and Fler. Updated as marketplace requirements change.